These are really nicely made. They are easy to install WiFi-enabled and it is easy to interface with them using our custom API.
I found a nice API for the wemo light switches here.
In the end though, I ended up creating a simple shell script API that uses CURL. You can see mine on github here.
I set up my WeMo light switch to control my bedroom fan. Then I sprinkled the top with rose petals.
Connecting this all together, I have a button on my phone that turns the fan on, sprinkling rose petals down, and turns bottender on, pouring two glasses of wine. Resulting in this:
Happy Valentines Day everyone!
Consider donating to further my tinkering since I do all this and help people out for free.
I've gotten a lot of e-mails in the past about controlling lights, plugged-in utilities, etc. with my voicecommand software on the Raspberry Pi and I decided to make a quick easy guide.
Why would you want to do this?
This is an easy question to answer. I walk into a room and I say Pi . . . Let there be light and behold the lights turn on. Or for those with less dramatic flair, just saying lights and having the lights turn on.
Having voice controlled lights in your house just seems convenient.
How can I do this?
It's easy actually.
I've created an image for the RPi that already has everything you need on it. This means it's easier than ever to control electronics with your voice.
Then you can wire them up to the pi using the GPIO and use pilight to control them. You wire them in as below:
The smaller unit is plugged into voltage, ground, and pin 17 while the larger board is plugged into voltage, ground, and pin 18.
Once your transmitter and receiver are wired up, simply point the remote at the receiver, run pilight-debug, and press the button on the remote you want to learn. Now you can copy that string and use pilight-send to send it.
Example: sudo killall pilight-daemon or sudo service pilight stop sudo pilight-debug
Then CTRL+C when you see a RF string. Mine looks something like this:
172 688 172 688 172 516 172 688 172 688 516 172 172 688 516 172 172 688 172 688 172 688 516 172 172 688 516 172 516 172 516 172 172 688 172 688 172 688 172 688 516 172 516 172 172 688 172 688 172 5814 **Note** Sometime's I have trouble escaping out of pilight-debug. When that happens I kill it (kill -9) from a different terminal
Now I can turn that light on.
First restart the pilight daemon: sudo pilight-daemon or sudo service pilight start
Now send the command: sudo pilight-send -p raw -c "172 688 172 688 172 516 172 688 172 688 516 172 172 688 516 172 172 688 172 688 172 688 516 172 172 688 516 172 516 172 516 172 172 688 172 688 172 688 172 688 516 172 516 172 172 688 172 688 172 5814"
but with your own string. Do this for the on and off settings for as many lights as you want.
Now I can add that command in a script and use voicecommand to run it when it hears the right command!
You can do this with voicecommand -e
You can read more about it at the hackaday projects page here.
And here is a quick video demo:
Consider donating to further my tinkering since I do all this and help people out for free.
With the introduction of the Raspberry Pi B+, a lot of people are finding image files aren't working unless updated first. Because of this, I went ahead and made a fresh image file for voicecommand on Raspbian that is A/B/B+ compatible.
I've also taken the liberty of putting wiringPi and pilight on it. This means it's easier than ever to control electronics with your voice (I'll post more on that later).
You can read more about it at the hackaday projects page here.
And here is a quick video demo:
Consider donating to further my tinkering since I do all this and help people out for free.
So it's been a little hectic. I moved to San Francisco and mid move, Google decided to deprecate their Speech V1 API. I switched to V2 but did it too quickly and had a lot of problems.
For those of you who haven't seen my voice control software, you can see it in action here and find out how to install it here.
After some investigation, I found that V2 is much, much, much slower over wget and switched to Curl. This should fix all the slow down issues.
I also re-enabled all the languages that Google enables. So now voicecommand again supports over 100 languages [ but not pirate I guess :( ]
You can update with the UpdateAUISuite.sh script in the install folder (run with sudo!)
Sorry this post took so long. I've been busy collaborating on a new app (also it's my Birthday today)
Consider donating to further my tinkering since I do all this and help people out for free.
Places you can find me
Sorry it took so long for this. Google's deprecation of the Speech v1.0 api came at the worst possible time for me as it was right before I started driving across the country.
I didn't get to fix it yesterday when I got into San Francisco either because I ended up going to Maker Faire and then hung out at a bar with all the Hackaday people. I met the guy who invented sudo and figured out I have the same watch as Mike Szczys.
Anyways, I've fixed voicecommand to work again and I fixed a couple of small bugs, including one in the install script which didn't copy the voicecommand config properly.
I have a brand new version of the Raspberry Pi Videolooper that solves a lot of the common issues I'm emailed about. Hopefully this solves problems for a lot of you. You can download the new image here:
For help you can post on the Raspberry Pi subreddit (probably the best way to get fast help)
How to set up the looper
Copy the above image to an SD card following these directions
If you want to use USB, change usb=0 to usb=1 in looperconfig.txt on the SD card (It is in the boot partition which can be read by Windows and Mac).
If you want to disable the looping autostart to make copying files easier, change autostart=1 to autostart=0 in looperconfig.txt
If you aren't using a USB (NTFS) put your video files in the /home/pi/videos directory with SFTP or by turning autostart off. Otherwise, put your video files in a directory named videos on the root directory of your USB.
Set your config options and plug it in!
Features
NEW: Has a config file in the boot directory (looperconfig.txt)
NEW: Has a autostart flag in the config file (autostart=0,autostart=1)
NEW: Has a USB flag in the config file (usb=0,usb=1), just set usb=1, then plug a USB (NTFS) with a videos folder on it and boot.
NEW: Updated all packages (no heartbleed vulnerability, new omxplayer version).
NEW: Only requires 4GB SD card and has a smaller zipped download file.
Supports all raspberry pi video types (mp4,avi,mkv,mp3,mov,mpg,flv,m4v)
Supports subtitles (just put the srt file in the same directory as the videos)
Reduces time between videos
Allows spaces and special characters in the filename
Allows pausing and skipping
Full screen with a black background and no flicker
SSH automatically enabled with user:pi and password:raspberry
Allows easy video conversion using ffmpeg (ffmpeg INFILE -sameq OUTFILE)
Has a default of HDMI audio output with one quick file change (replace -o hdmi with -o local in startvideos.sh).
Can support external HDDs and other directories easily with one quick file change (Change FILES=/home/pi/videos/ to FILES=/YOUR DIRECTORY/ in startvideos.sh)
This is perfect if you are working on a museum or school exhibit. Don't spend a lot of money and energy on a PC running windows and have problems like below (courtesy of the Atlanta Aquarium)!
If you are a museum or other educationally based program and need help, you can post on the Raspberry Pi subreddit (probably the best way to get fast help) or contact me by e-mail at help@stevenhickson.com
Consider donating to further my tinkering since I do all this and help people out for free.
I decided I wanted to make a small game where you were a viking and you threw fireballs at enemy vikings on Unity 3D. The catch is, I wanted to actually throw the fireballs, so I wanted to use the Kinect, and I wanted to actually see if I was the character, so I wanted to use the Oculus Rift.
Here is a quick video of the results before we get on to the discussion:
Basically this started because a colleague at Georgia Tech, Alex Trevor (soon to be Dr,), had an Oculus Rift and mounted a camera on top of it to see the Kinect output with the Oculus Rift. I thought that was really cool and had previously worked on a game that used the Kinect Skeleton to throw fireballs (though I lost all the source code for the first version). I really wanted to combine those ideas and had to start over.
Luckily, Dr. Brian Peasley (now at Microsoft) came to my rescue as always and gifted me an Oculus Rift.
To explain a bit, the Oculus Rift is an immersive virtual reality headset. The two images are displayed on the screen above because one is projected to the left eye and one to the right eye. As you rotate your head, the images change and it feels like you are looking at a real environment (it is pretty amazing). This is why there are two images in the video (and pretty much all Oculus Rift demos). To appreciate it fully, I recommend wearing an Oculus Rift while watching the video.
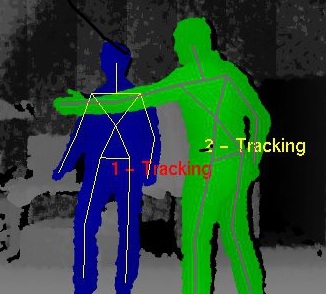
The Kinect everyone should know by now. It can yield a really good skeletal estimation of a person's joints from the depth data, which can then be used to represent gestures.
I had some time this week so I grabbed the Unity third person MMO example, added the Kinect scripts provided by CMU here, created my own fireball and fireball related prefabs and scripts, added the Oculus package, changed all the camera stuff to make it first person, and tweaked a lot of stuff. Daniel Castro (also at Georgia Tech) was nice enough to help me film me making a fool of myself.
It was obviously a bit more complicated than that. Lots of tinkering and scripting was involved to get things working but that is the output. Here at RIM, we are working on lots of other cool things and if you are interested, check out some of my other projects.
I've uploaded the source for public use and you can find it here (just make sure to please cite me):
The fireball script just takes two Game objects (the Viking's left hand normalized by your hip) and uses a velocity measurement to determine if you want to throw the fireball, then it creates a fireball and set's its velocity to your hand's velocity whenever you throw. This can be done easily with a small amount of code as below:
And that's it for the fireball. Then there are some scripts destroying the fireball and vikings when they collide.
For the mapping of the joints to the main Viking, each joint position of the Viking is mapped to the corresponding Kinect Skeleton joints with GameObjects in the KinectControllerScript.
Then the Oculus SDK is used to create the camera and player control mapped to the main viking.
I'm using a friend's version of Unity Pro because I'm a poor graduate student. So please donate if you liked this work so I can continue doing it. All of these gadgets are expensive and I do all this and post it for free.
So please consider donating to further my tinkering!!

 Belkin WeMo Light Switch, Wi-Fi Enabled